
1.Frequently Asked Questions
Managing unsubscribes, bounces, complaints
Your bounces, unsubscribes, and complaints are processed automatically. Those contacts are not physically removed from your Lists, but rather tagged with status for appropriate action. When a contact hard bounces or complaints, they are not sent emails again. An unsubscribe stops receiving future emails unless they are deleted and then re-added to the list, so keep this in mind when deleting any unsubscribes and re-importing Lists with duplicate contacts. A contact is treated as undeliverable after it soft bounces 5 times (default), but you control this setting on your Brand settings page. The most common reasons for a soft-bounce are inbox full, email size too large, or mailbox provider is down. Consider your email frequency when changing the default setting for soft bounces. You can use a webhook to send events (bounces, complaints, and unsubscribes) to your application by adding your webhook URL on the API page (click on Account in the header, then select API from the menu).Bulk campaign paused
Bulk campaigns are automatically paused if the bounce rate is above the threshold set on the brand settings page. For best deliverability and inbox placement a bounce rate below 3% is recommended. You can change the threshold to be higher or lower in the 1-15% range on the brand settings page under “Advanced Options” section, the default is set to 8%. You can also unpause a campaign that was paused to continue sending, just click on arrow down icon next to a paused campaign and select Unpause option. To prevent a high bounce rate you should always validate your list before importing it, if the list hasn’t been engaged longer than 2 months. A typical monthly decay rate for email lists is 2% for B2C and 3% for B2B lists. An unengaged list older than 6 months can bounce at over 10% rate and hurt your sender reputation.Managing Subscription Preferences
You can create message types to manage your subscriber preferences for email types they want to receive from you. Click on your brand name in site header then select “Message Types” from the menu. Message types appear on unsubscribe page, and you can specify it for a given campaign on the campaign screen. It’s a good idea to mention email frequency in the message type name, e.g. “Weekly newsletter” or “Occasional offers from partners”.2.List management
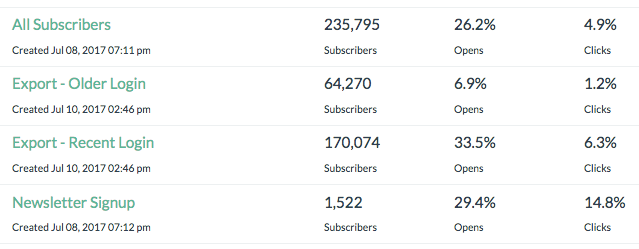
Lists behave like tags (so they are virtual groups of emails) and can be used in a variety of ways, depending on your business needs. A contacts (unique email address) exists in one brand only once, and can be a part of different Lists.
Lists Based on Email Collection Sources
If you are collecting emails from a variety of sources, for example sign up forms on your website’s homepage/articles or member registrations, it might be helpful to define your Lists based on collection sources. You can have multiple web collection forms for the same Lists, so you can setup with more or less detailed breakdown.

Separate Lists help you see and understand your engagement stats for each of your lists and get to insights on which source maybe producing low-quality or high-quality email lists.
Lists as Main Customer Segments
While you can segment your campaigns on any of your data points, it maybe beneficial to define lists based on most commonly used criteria like Members vs. Paid Customers, or segment your customers based on product/service they purchased so you can see engagement stats across those major segments on the main Lists view. Using your main segmenting criteria to define your lists can also help you streamline your campaign setup workflow and lower risk of mistakes (sending an email to a larger than intended audience).
Lists as Both, Sources and Segments
You could actually combine the two techniques described above. Just make sure to name your lists in a way that prevents confusion as to what they are.

Test Lists
It’s very useful to create a List named “Test”, and add your own email addresses to it, so you can use it for sending test campaigns and to include on final sends to get a final copy of the email that went out to your subscribers.
It’s best to never upload contacts into All Contacts or use it for testing your automation campaigns to avoid unintended consequences.
3.Adding contacts
We recommend to always create Lists to add your contacts to, including a separate TEST List with your own emails to help future testing.
There are several ways to add contacts to a List:
- Manual import of a CSV file.
- A web form that sends data to a List it’s assigned to.
- An API call (e.g. to create a contact in a List when someone makes a purchase).
- Manually adding contacts one by one (e.g. for test records).
Keeping your contacts in separate Lists would help you see how your difference audiences engage and you can setup Automation campaign triggers against new records added to your Lists.
It’s a good idea to define all your fields before adding contacts – click on your brand name in the header and select Fields in the menu. Fields can be created automatically during a manual import or API call, but it can be created with a wrong data type if the data formatting is off and it can change the operators available for segmentation. For example, if your dates are in a wrong format the field can be created during import as text field and operators on segmentation will be “equal to” and “not equal to” instead of “before” and “after”. Or you could end up with multiple columns for the same data point because your import files/sources used different column names.
If you have all fields pre-defined you will have a chance to map your columns to your fields during a CVS import step.
4.Delete contacts
There are a 3 ways to delete contacts:
1. If you want to upload a file of users to delete across all your lists (for example as a result of unsubscribes outside the platform) you can use “Delete Contacts” button on the Lists main page.

2. You can also choose a List to delete contacts from. Go to Lists tab in the header and click arrow down icon on the gray button next to list:

Then click the checkbox to delete contacts from the List.

Any contacts in the selected list will be removed from all your Lists. Any contacts that have been sent an email in the last 21 days will not be removed, because once a contact is removed, the unsubscribe page stops working for that contact. This may result in the recipient clicking on Complaint/Spam button instead, which may negatively affect sender reputation.
3. You can manually delete contacts 1 by 1 on contacts view – just click on the Lists name and use paging or Search to locate the contact you want to delete. We don’t recommend using this option except for your own test records because ALL data and activity history is deleted with this option so no reference of the contact and your action remains.
Deleting a List Segment
If you want to delete a segment, you need to export it as a segment first then:
- Use method #1 described above, OR
- Import it into a new List, e.g. “Unengaged – 120 days”, and then delete it. This method would allow you to temporarily stop emailing the List before it can be deleted, using “Exclude” option.
5.Email collection via web form
To add an email collection form you need to create a List first, then click on the arrow down button next to List name (on Lists tab) and select “Forms”, see:

Once on a Forms screen, just click on Create a Form button, name your form and hit Save.

You have an option to add reCAPTCHA to your forms as well, if you want to prevent sign ups from bots.
NOTE: By default, only the Email field will be listed, unless additional columns have been defined via an import of data into that list or the additional fields/columns were manually defined. To define fields, click on your brand name in the site header and select “Fields”. Make sure to specify correct data type for each field you create, it will have an impact on the operators that will be available during segmentation.
Once the form is defined you have 2 options for using it:
- Copy the code provided and embed it into your website.
- Link to a hosted signup form.
6.Unsubscribe page
You can customize your unsubscribe page in several ways:
- Add your brand logo (under Brand Settings page), which will replace the text name of your brand.
- Add message types to allow subscribers select the emails they want to receive based on their preferences. To add message types click on your brand name in the header and select “Message Types” in the menu. It’s a good idea to mention email frequency in the message type name, e.g. “Weekly newsletter” or “Occasional offers from partners”.
- Host your unsubscribe page on a custom domain that matches your sender email and tracking links in your emails. To use this feature you need to have a verified sender domain. It’s not possible to setup custom tracking without access to DNS records for a domain you own.
- Customize the text that appears above the message types to match your unique communication style.
Here is an example of an Unsubscribe page hosted on a custom URL with custom message types.

7.Templates Management
Templates and Editors
You have the option to use your existing templates by copying HTML code into the Classic editor (use </> icon to switch between code view and rich-text editor).
With the Drag-and-Drop editor you can create advanced layouts and all templates are automatically mobile optimized. You also have an access to a library of email templates and stock images which you can use at no extra cost.
You can not push templates between the editors, if you switch an editor all your template work will be lost.
You can create a new template under Templates tab, or push a template into your library from the campaign screen.
8.Creating and sending a bulk campaign
Marketing emails are also often referred to as promotional, bulk, broadcast, newsletter, or email blast.
An unsubscribe link is required on all Bulk/Marketing campaigns.
Adding an Unsubscribe Link
In Drag-n-Drop Editor (while on Text element):

In Classic Editor:

To lower a complaint rate and improve inbox placement it may be beneficial to:
- Use extra text around your unsubscribe link similar to “You have received this email because [reason or method of getting on the list]. If you no longer want to receive these emails please Unsubscribe“
- Use the word “Unsubscribe” or “Opt-out” instead of other alternatives like “Manage Preferences” or other less explicit instruction. Mailbox providers scan the email body for the presence of the unsubscribe link so it is best to make it easier to locate. Avoid using “click here” phrase as unsubscribe link, it’s considered a spam phrase and can increase your spam score.
Tracking Options
By default, opens and clicks and tracked automatically on all campaigns. You have an option to turn off click tracking if you don’t want to use our tracking link in your email. You also have an option to use a custom tracking domain that matches your sender email, which can greatly improve your inbox placement. You also have an option to include additional parameters to your links, for example utm_ parameters for Google Analytics.
Volume Throttling
If you send more than 50000 emails per day then volume throttling may be of benefit, especially if you are using a new sender address and don’t have a history of sending more than 10000 emails per day. If you don’t see this option in your UI (on the bulk campaign screen above the scheduling section) reach out to your account administrator to get it enabled. We suggest you limit your sending to 6-8k per 30 min, for a list 50000-100000, and 20000 for a list over over 100k, for best deliverability and inbox placement and start around 6:30am (local time) on week days.

9.RSS to Email Campaign
To setup an email based on RSS feed you need to create a new campaign of type RSS – click on “Create New” on campaign dashboard (Campaigns tab in header) then select RSS campaign type and desired schedule (daily, weekly, monthly). Make sure your RSS feed is using a valid published date – the recommended date format is RFC822.
You can pull in a single/latest RSS item by dropping merge tags into your template via the menu options in the drag and drop editor.

To add merge tags into your HTML template code or to loop through multiple RSS items you would need to use merge tags as part of HTML block.
You can control merge tags syntax in the drag-and-drop editor using the custom HTML element.
You can use RSSITEM:IMAGE or RSSITEM:IMAGE_URL to add an RSS item image into your template. The first will output a full HTML image tag for the item image, the second will just be the url. The first you will want to use with the SAFE / HTML filter so that the content is not escaped, example:
*|END:RSSITEMS|*
10.Automation campaign
An Automation campaign can consist of 1 or more emails. It can be setup as a simple confirmation (aka auto-responder) for a signup action, e.g. a welcome email when a subscriber joins your mailing list.
The most typical trigger for an Automation campaign is a contact being added to a list, which can happen via web form, transactional email, API call, or a 3rd party integration.
The emails in a sequence can be triggered with:
- A trigger condition based on engagement, and
- Custom defined time frame in hours, days, or weeks based on condition specified
Each email in the Automation campaign can be in either HTML or text-only format and each email can be activated or paused at anytime. A sequence can also be re-arranged at anytime – you can drag an email step into a new position in a sequence but no history of changes in the sequence is stored (no revision history).
The automation emails are scheduled at the time of the trigger, ignoring any delay rules. So if the trigger for an email step is “after previous email is SENT” then the email is scheduled as soon as the previous email is SENT, regardless of delay rule. Re-arranging steps for a live sequence, or changing delay rules, will not have any impact on emails already scheduled.
One way to make changes to a live sequence is to copy the step you want to move, then pause original in its place and set live the new step in new place or with new trigger rule. This way you preserve stats for the original rules used.
Using the copy and pause method doesn’t prevent any subscribers from receiving the same email twice, it’s just one way to not mix up stats for states before/after change is made. You can try to exclude subscribers from the new version using campaign engagement on a segment as “didn’t open any campaigns in X days” if there are no other emails being sent to subscriber (e.g. transactional).
11.Deliverability and Inbox placement
Email deliverability and Inbox placement are influenced by many factors like IP reputation, sender (email/domain) reputation, sender domain configuration, and engagement.
To troubleshoot why your email landed in spam folder consider these questions:
- Is your email sender domain DKIM and SPF properly configured?
- Do you need to build your sender reputation for sending high volume?
- Does your email subject line and message body use many spam words?
- Should you consider using a dedicated IP?
- Was your unsubscribe link using some uncommon text label?
- Did you send a test email without an unsubscribe link added or with merge tags and don’t have sample values defined (Fields tab under brand settings)
You can discuss deliverability issues and option to add dedicated IP addresses with your account administrator.
12.Analytics and Reporting
There are several types of reports available and you can also configure a web hook for sending data to your application to sync up unsubscribes, bounces and complaints.
Campaign Reporting
Below is a screenshot of the top of the Campaign Reporting screen – you can click on stat headers (Clicks, Opens) to view contacts list or click on the icon circled in orange to download the data as a CSV file. Below this section you can also see Top Links section and engagement graph in 48 hours or 30 days.

You can check campaign engagement by mailbox provider to help you evaluate and optimize further. You can find the link on the Campaign report page.

Report Across Campaigns
To see all campaign stats and to download a report go to Campaigns tab in the header, then look for “Reports” button on top right:

Once on reporting page you can set date range and download a CSV file of the campaign engagement data.
Bounces, Unsubscribes, and Complaint Reporting
BigMailer automatically handles bounces, unsubscribes, and complaints. Those contacts are not physically removed from your Lists, but rather tagged with status for appropriate action. When a contact hard bounces or complaints, they are not sent emails again. An unsubscribe stops receiving future emails unless they are deleted and then re-added to the list so keep this in mind when re-importing Lists with duplicate contacts. Best to not delete those records.
By default, a contact becomes undeliverable after it soft bounces 5 times, but you control this setting on your Brand settings page. The most common reason for a soft bounce is inbox full (others are rejections for attachments too large or provider service down), so consider your email frequency when changing this setting.
You can setup a custom webhook on your API page to receive events data from BigMailer – unsubscribes, complaints, and bounces.
13.Merge Tags
You can use merge tags in your email template text or links and these fields – subject line, preview, From label, and custom reply-to label. To add merge tags into fields outside email template just add them to template first, then copy/paste into the desired field.
Here is how to add merge tags into your email template:
In Drag-n-Drop Editor (while on Text element) click on Merge Tags:

In Classic Editor – select the field you want to drop into template:
There are also some tags for system defined values:

The ID of the contact is often used to customize URLs, especially for ads.
You can use basic conditional merge tags in both Classic and Drag-n-Drop editors to:
- Specify a fallback/default value.
- Add IF/ELSE conditions.
- Loop through a set of data, including multiple RSS items.
Default Value
Here is how you would specify default/fallback value:
*|DEFAULT:FIRST_NAME, 'Friend'|*
Using the if merge tag you can make the content of your campaigns conditional on the attributes of the contact. The ELSE section is optional.
*|IF:STATUS = 'paid'|*
    <p>Thank you for subscribing!</p>
*|ELSE:|*
    <p><a href="#">Subscribe now and receive 10% off</a></p>
*|END:IF|*
The if merge tag can also include 1 or more ELSEIF sections:
*|IF:STATUS = 'paid'|*
    <p>Thank you for subscribing!</p>
*|ELSEIF:STATUS = 'cancelled'|*
    <p><a href="#">We want you back! Get 20% off</a></p>
*|ELSE:|*
    <p><a href="#">Subscribe now and get 10% off</a></p>
*|END:IF|*
RSS Items
You can use RSSITEM:IMAGE or RSSITEM:IMAGE_URL to add an RSS item image into your template. The first will output a full HTML image tag for the item image, the second will just be the url. The first you will want to use with the SAFE / HTML filter so that the content is not escaped, example: